Using Site Studio with Acquia DAM
In order to use Acquia DAM with Site Studio, there are a few steps that are required to integrate Site Studio with Acquia DAM.
Step 1 - Installing and configuring Acquia DAM module
To install and configure Acquia DAM:
- Install the Acquia DAM module
- Connect and configure the module following the Acquia DAM installation guides:
Step 2 - Configure Site Studio
- Navigate to
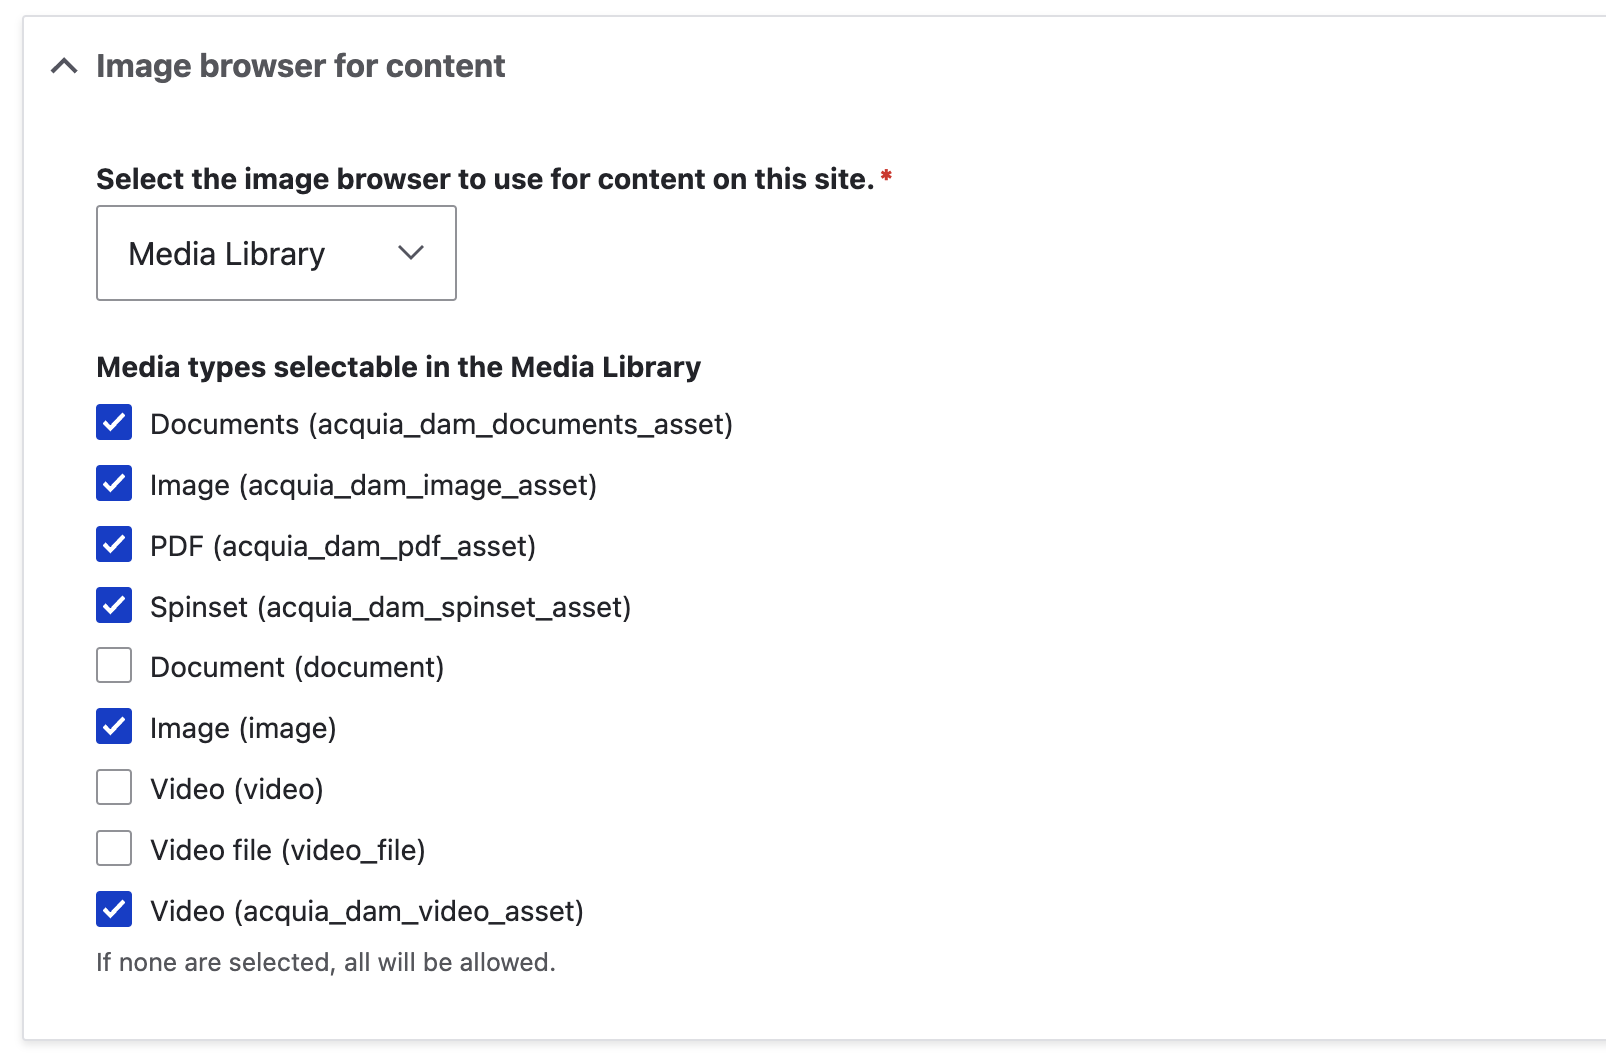
admin/cohesion/configuration/system-settings - Select
Media Libraryas the Image browser for content - Check the Acquia DAM media entities that should be available in the browser and save:

Step 3 - Select media from the DAM!
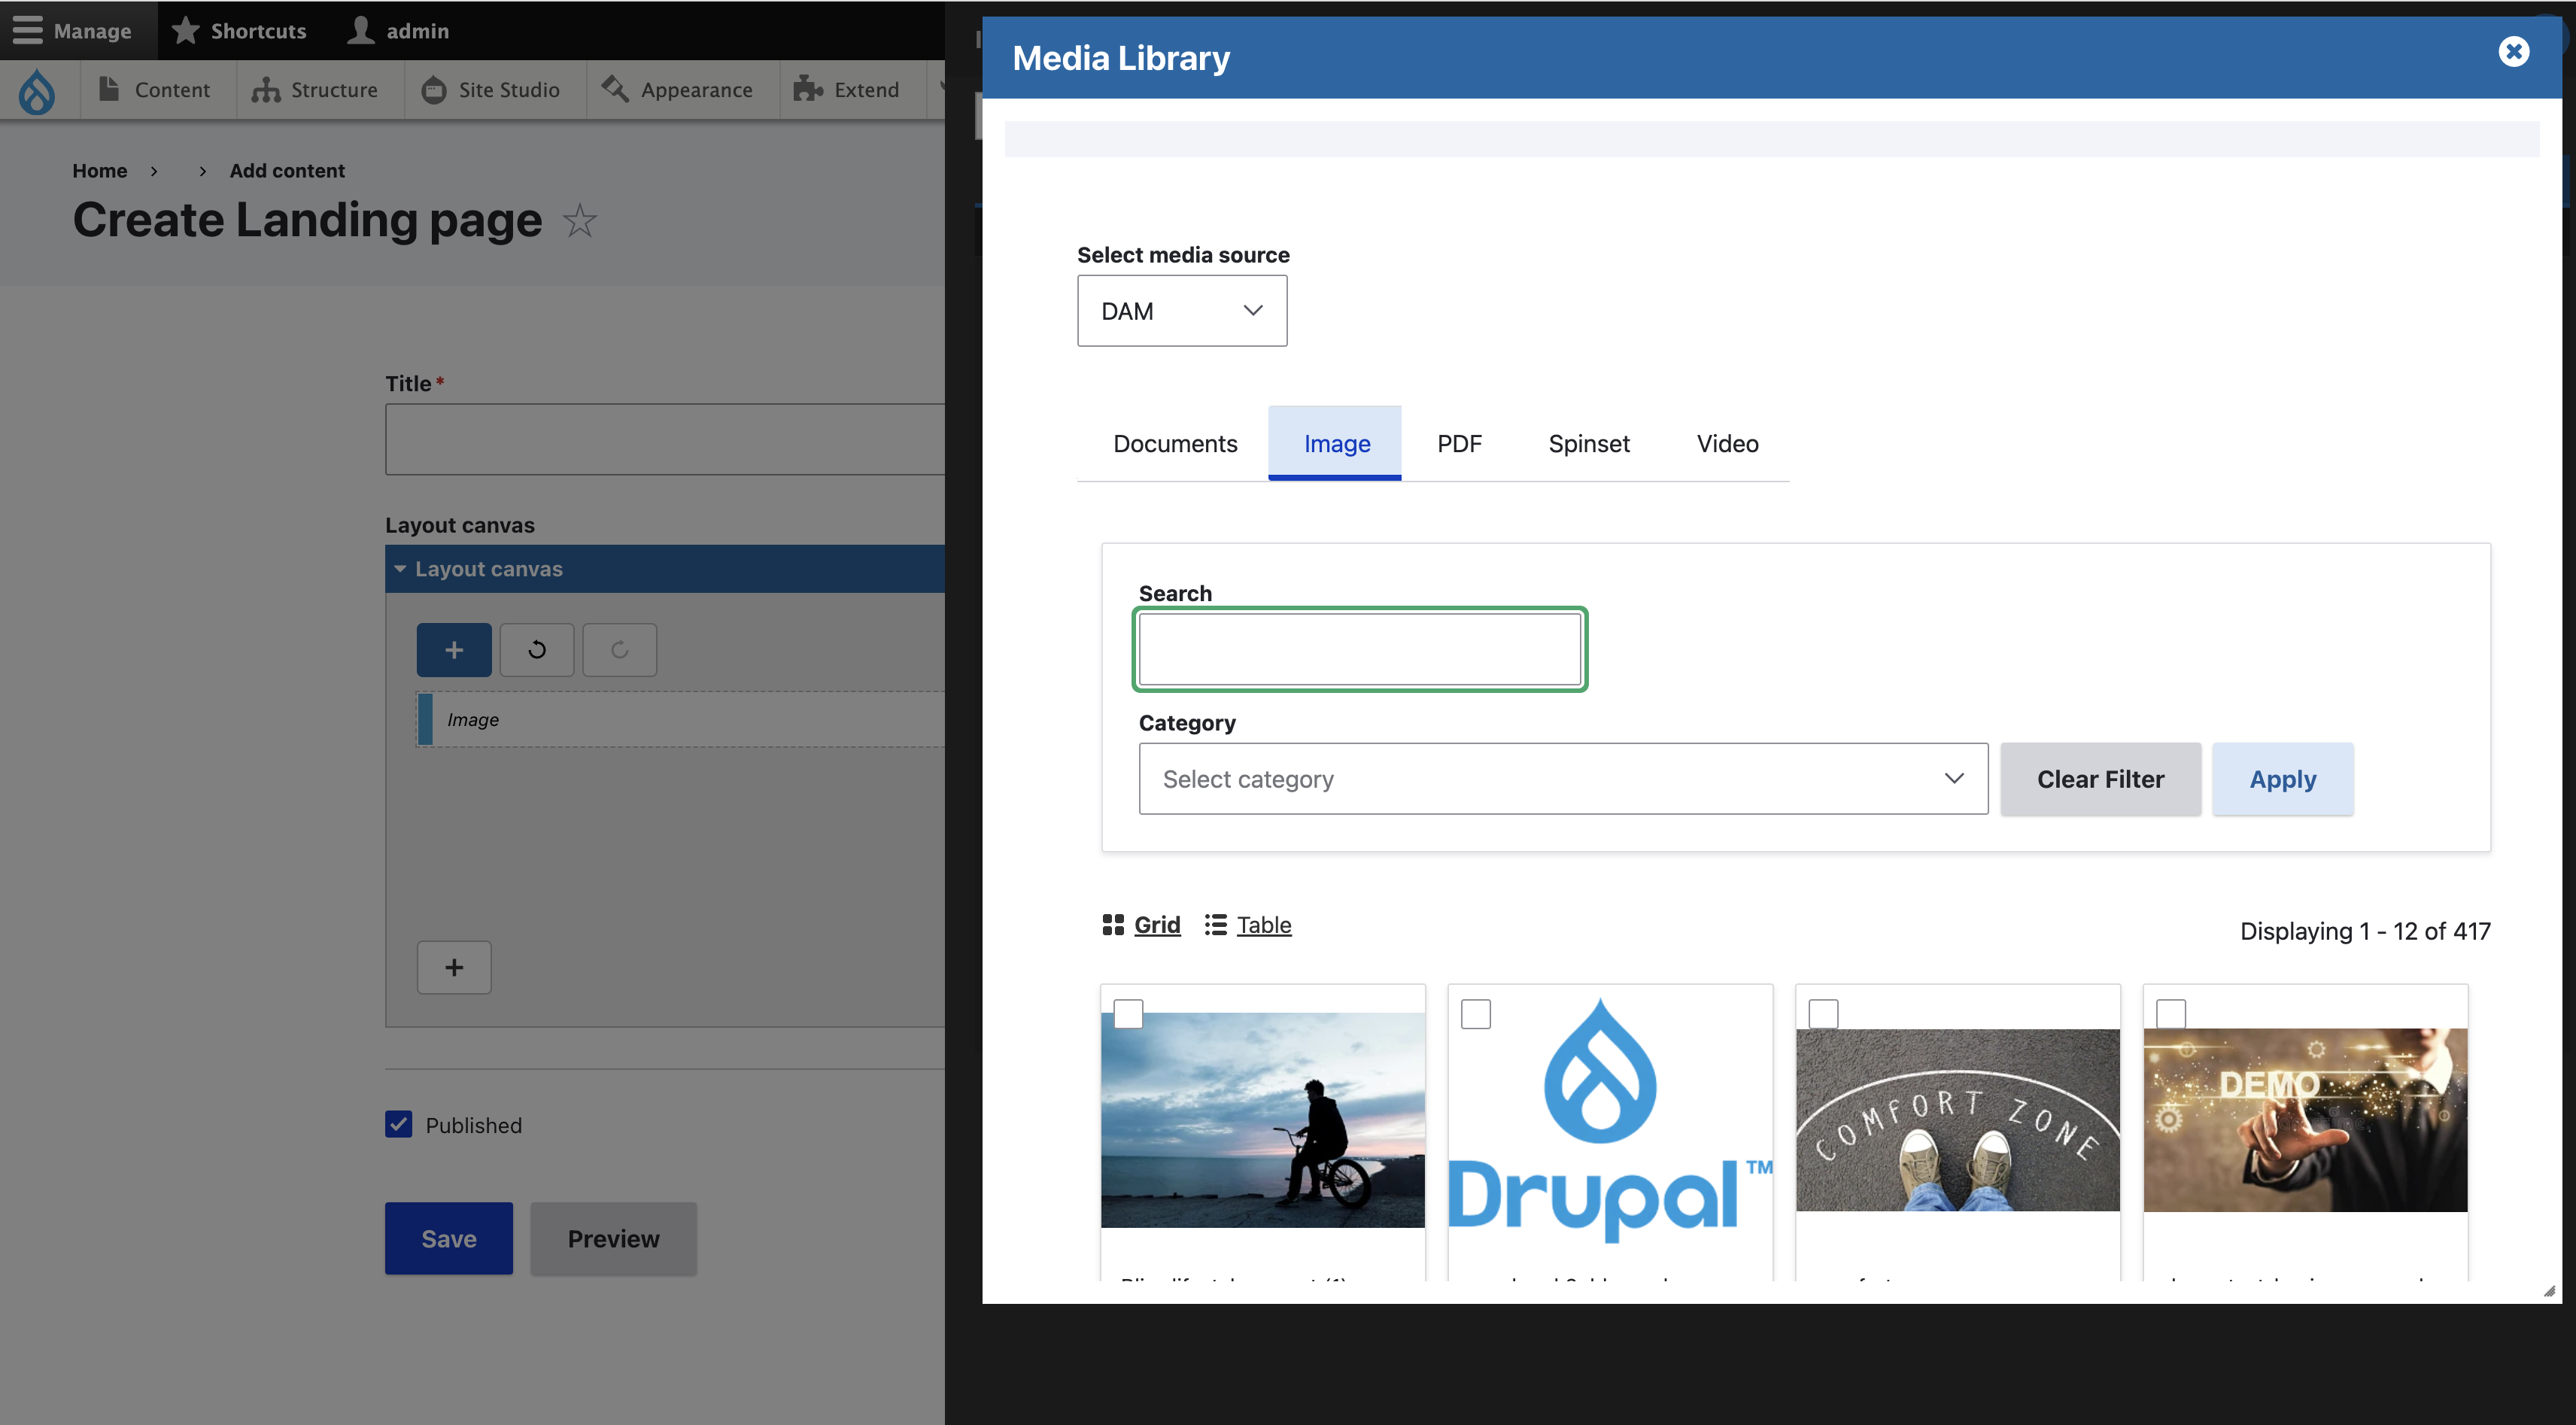
- Drag a component that uses an image uploader onto the layout canvas
- Select media from the DAM


