Managing your custom styles
You can manage your existing Custom styles including editing, disabling, disabling selection and deleting them.
Editing a custom style
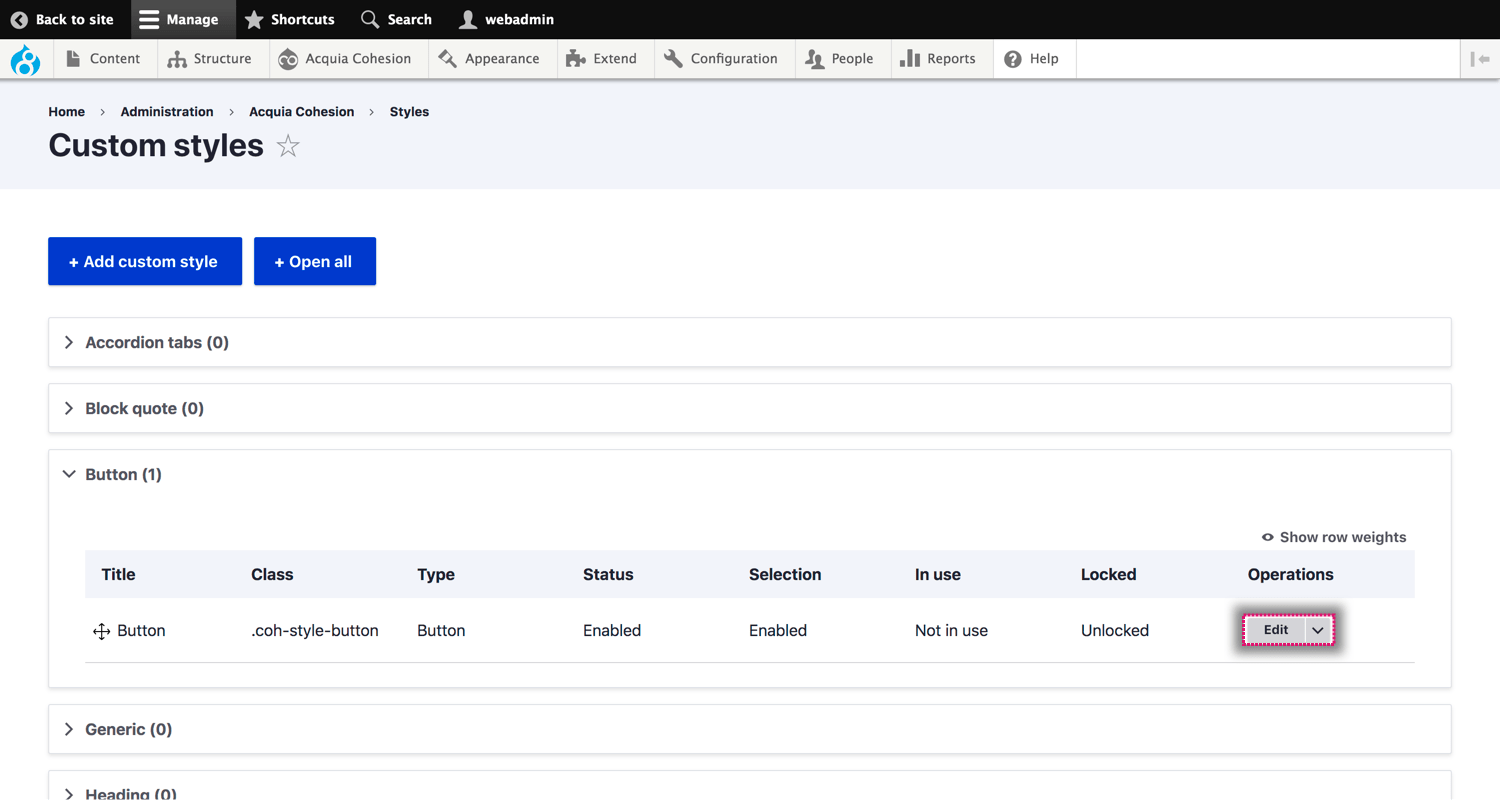
- Navigate to Site Studio > Styles > Custom styles
- Find the Custom style you want to edit
- Click Edit
- On the next screen, edit the style using the Style builder
- Click Save and continue
- The changes you have made to your style will be applied
Disabling a custom style
When you disable a Custom style it will no longer be used and its CSS will be removed from your style sheet. Any content using the style will use the base style. Note: Any extended style will also be disabled.
- Navigate to Site Studio > Styles > Custom styles
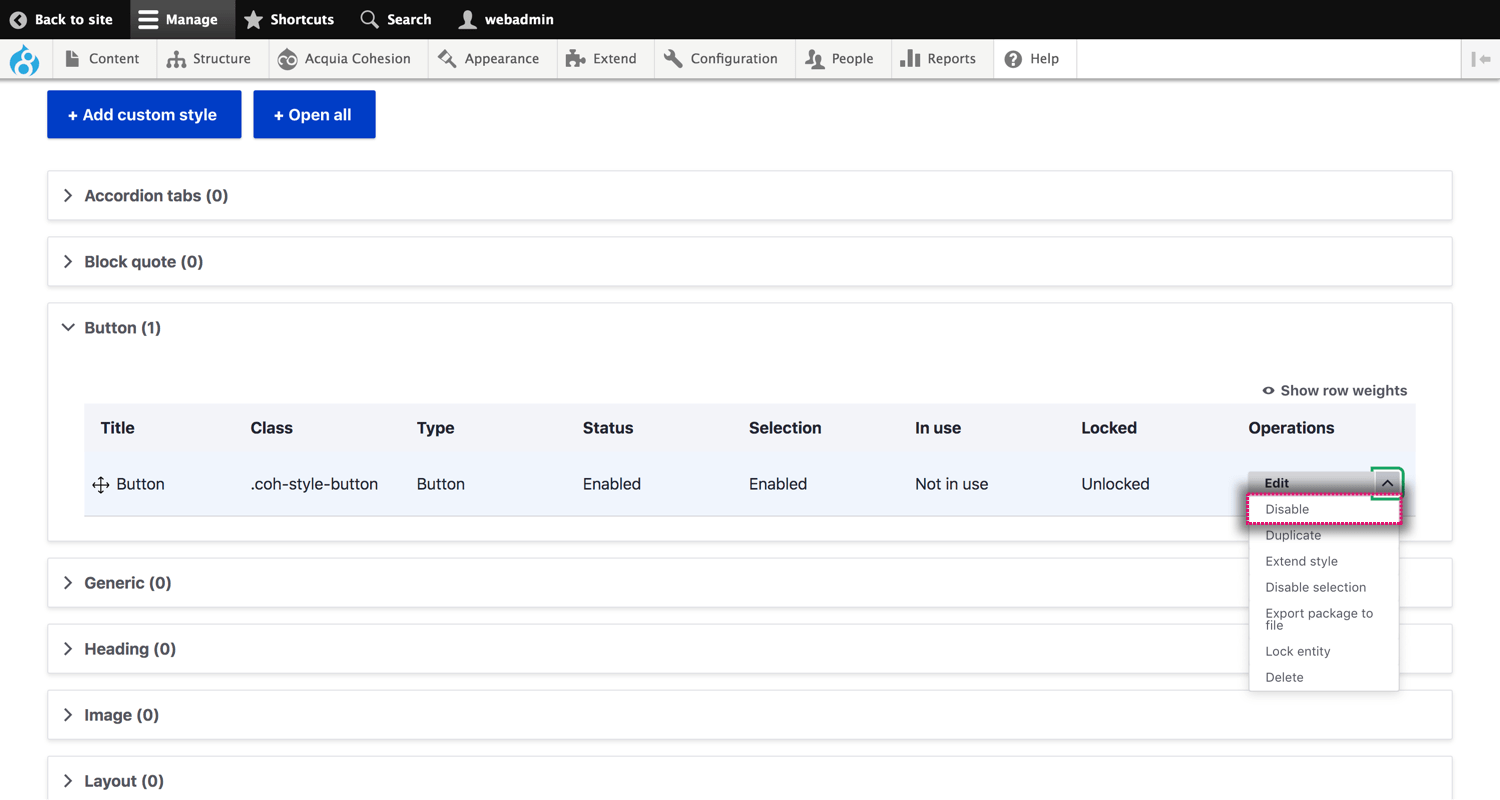
- Find the Custom style you want to disable
- Click Disable
- On the confirmation screen, click Disable
Enabling a custom style
When you enable a Custom style its CSS will be applied to your style sheet. Navigate to Site Studio > Styles > Custom styles
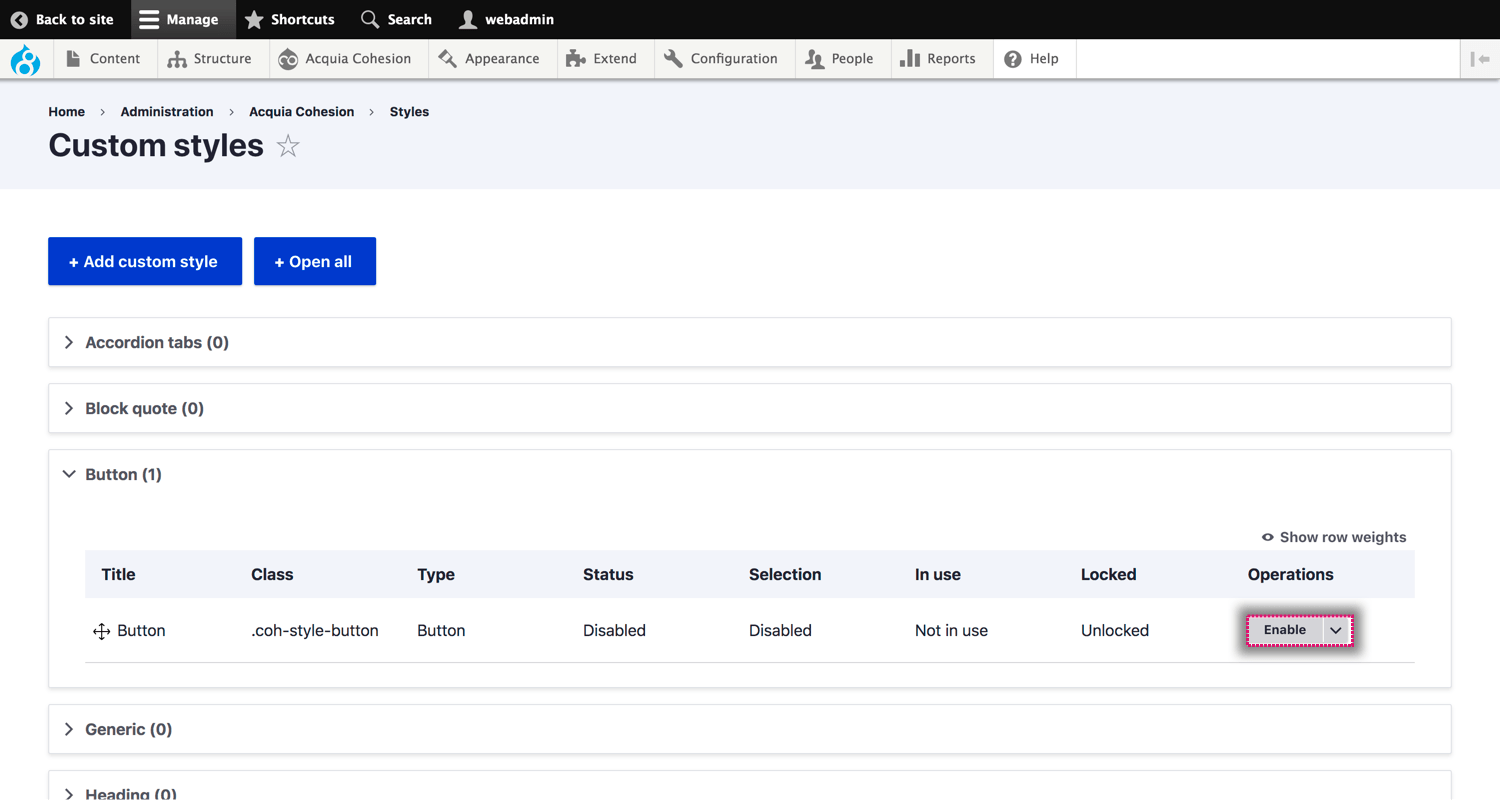
- Find the Custom style you want to enable
- Click Enable
- On the confirmation screen, click Enable
Disabling selection of a custom style
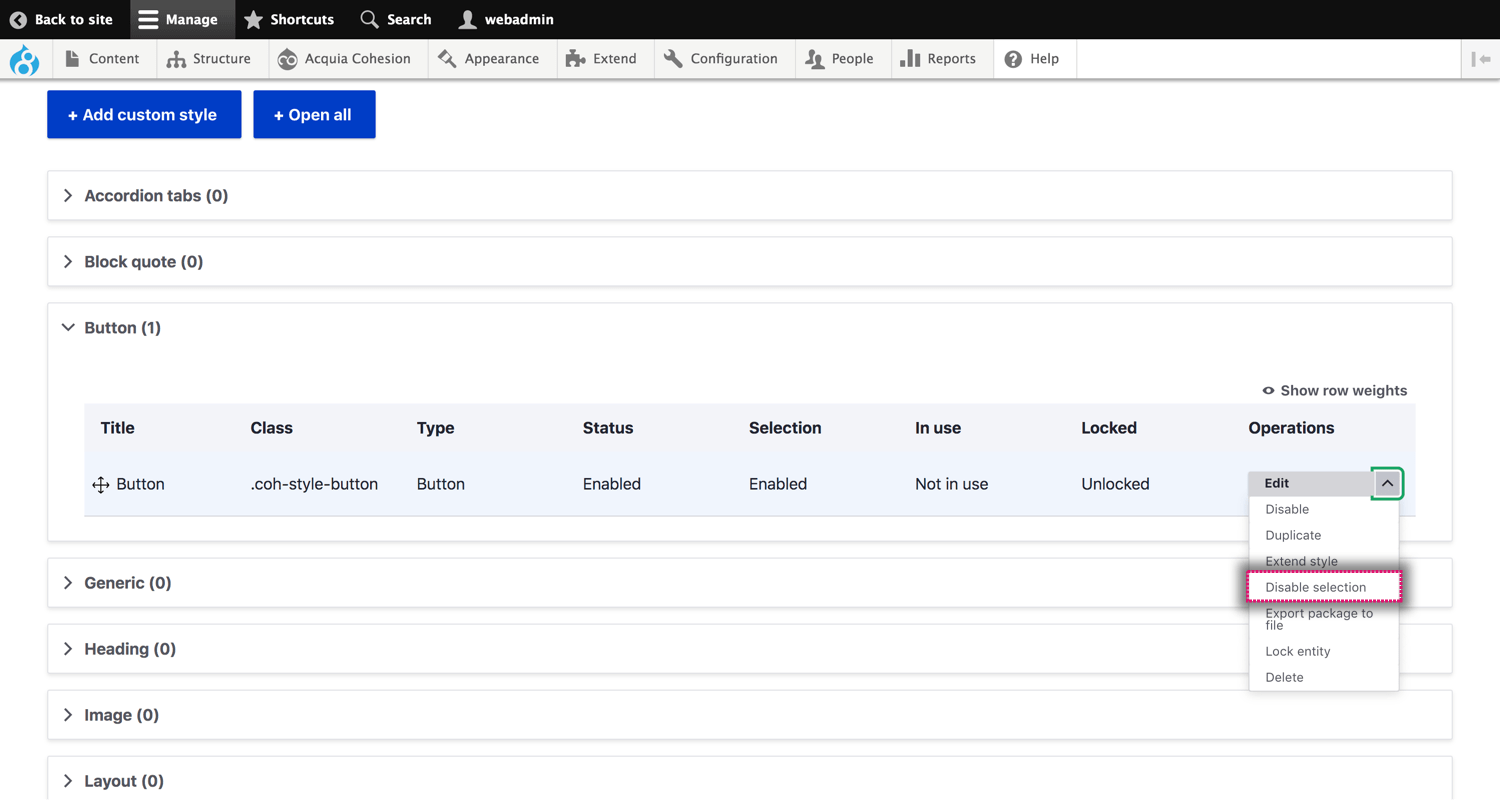
When you disable selection of a Custom style it will no longer appear as an option to select in the layout builder elements. Disable selection allows you to depreciate a style without it breaking instances where it's used currently.
- Navigate to Site Studio > Styles > Custom styles
- Find the Custom style you want to disable selection
- Click Disable selection
- On the confirmation screen, click Disable selection
Enabling selection of a custom style
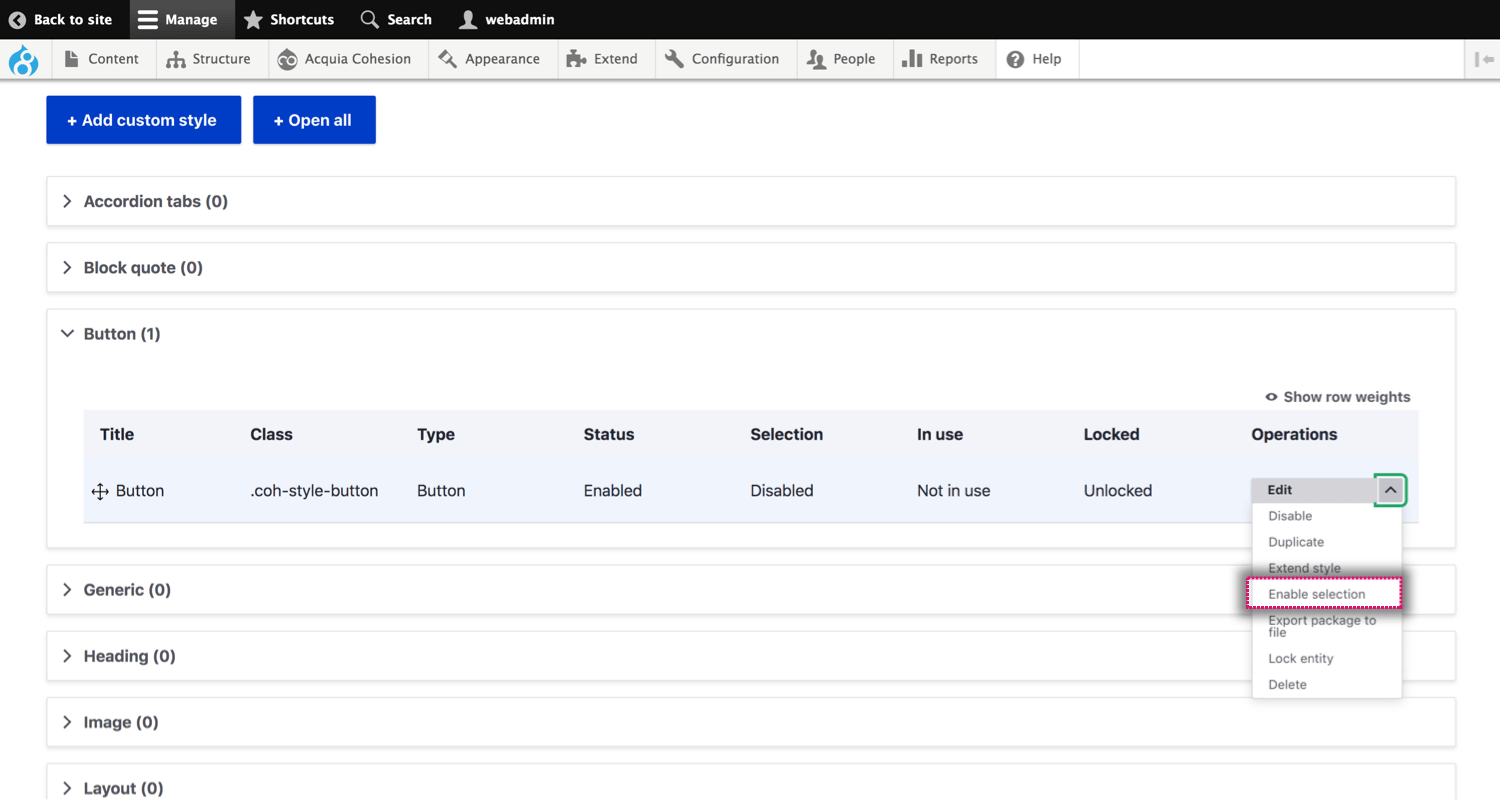
When you enable selection of a Custom style it will appear as an option to select in the layout builder elements.
- Navigate to Site Studio > Styles > Custom styles
- Find the Custom style you want to enable selection
- Click Enable selection
- On the confirmation screen, click Enable selection
Export a custom style
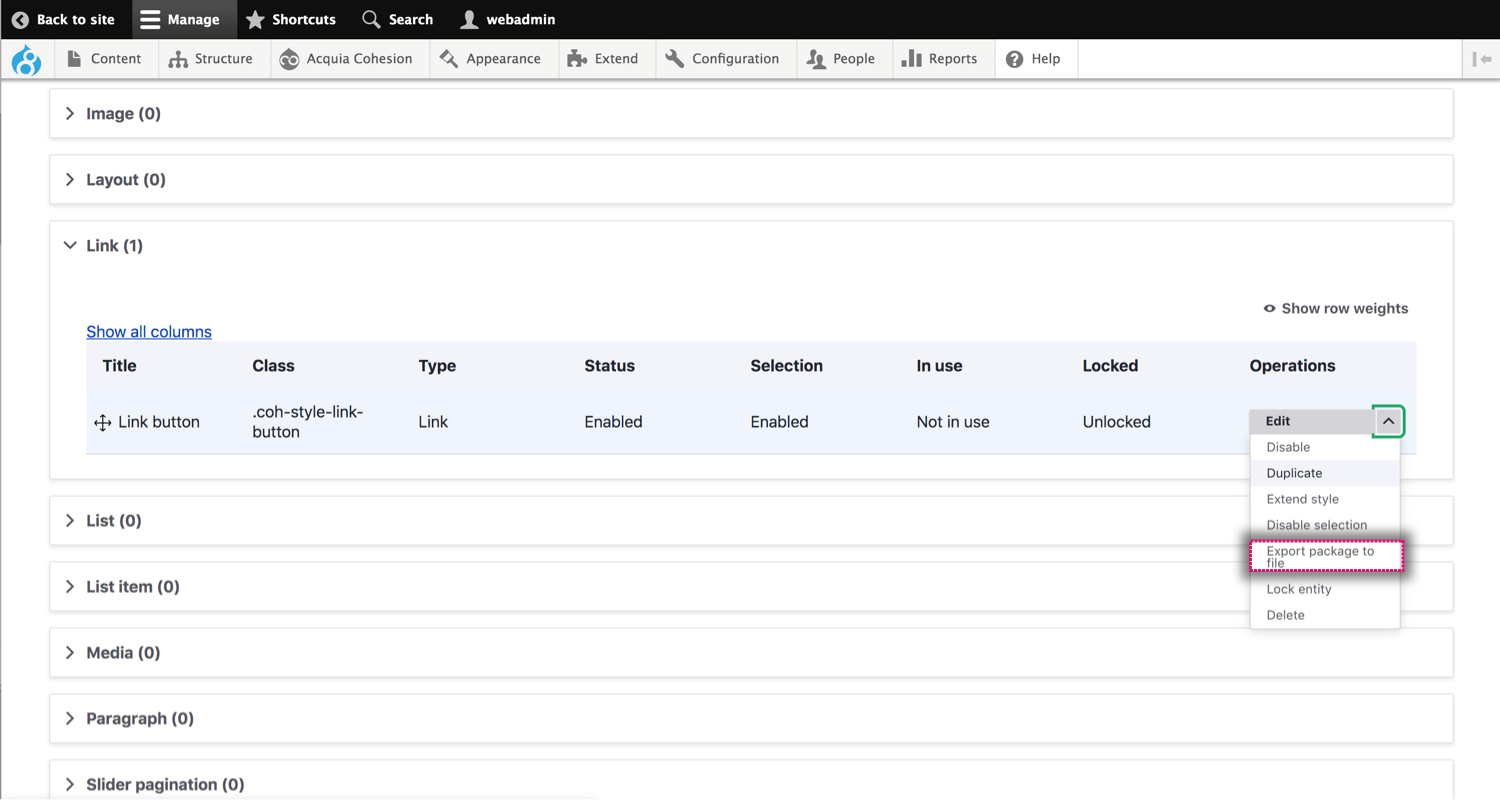
Site Studio allows you to export a single base style to a package file.
- Navigate to Site Studio > Styles > Custom styles
- Find the Custom style you want to export
- Click Export package to file, for more information on exporting configuration using Site Studio sync
- A .yml file will then be downloaded
Lock a custom style
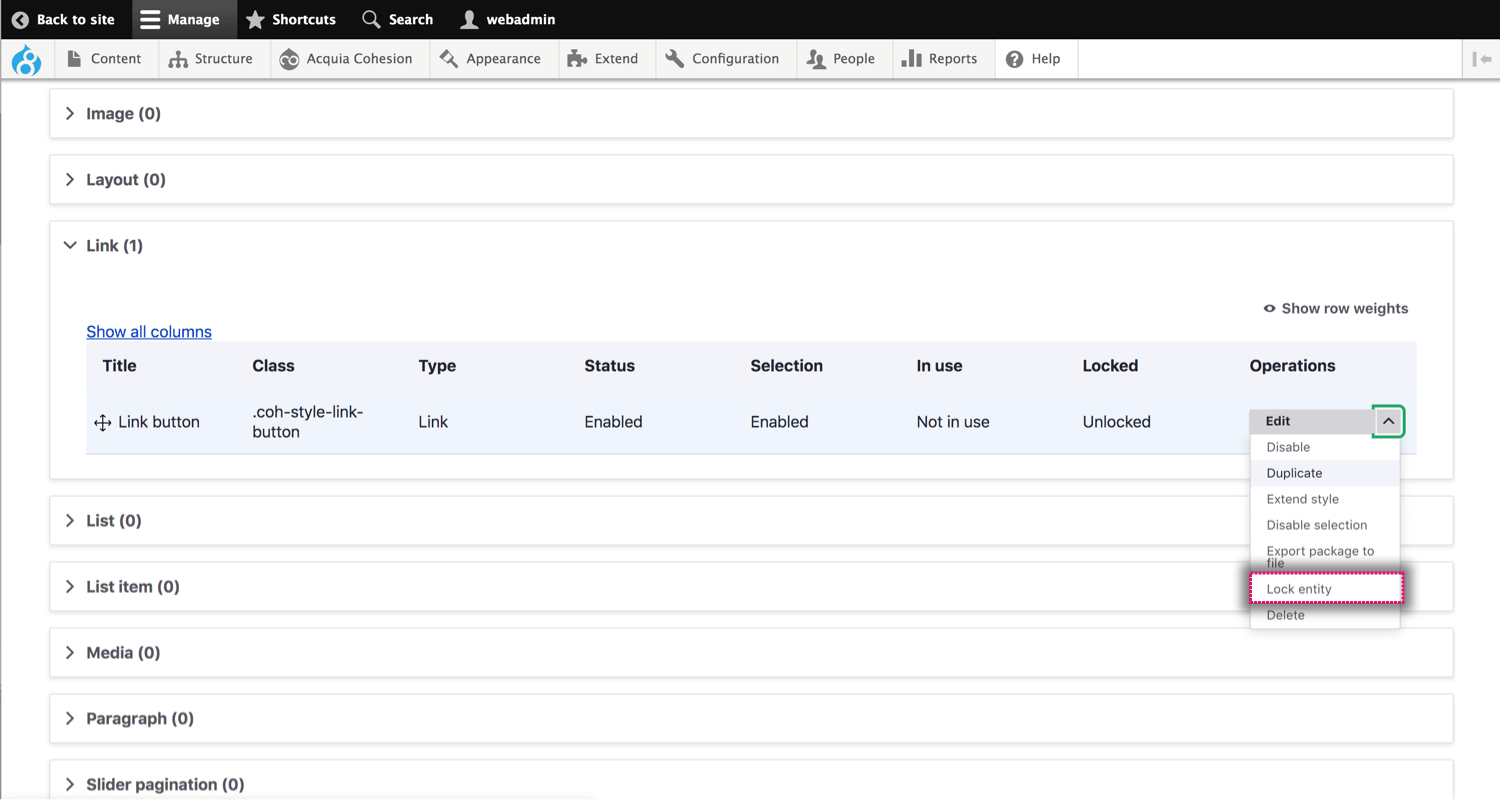
Locking a base style will stop the base style from being overridden if changes are detected when importing using Site Studio sync.
- Navigate to Site Studio > Styles > Custom styles
- Find the Custom style you want to lock
- Click Lock entity
Deleting a custom style
When you delete a Custom style it will permanently remove the CSS and configuration. Any content using the style will use the base style. Note: Any extended styles will also be deleted.
- Navigate to Site Studio > Styles > Custom styles
- Find the Custom style you want to delete
- Click Delete
- On the confirmation screen, click Delete

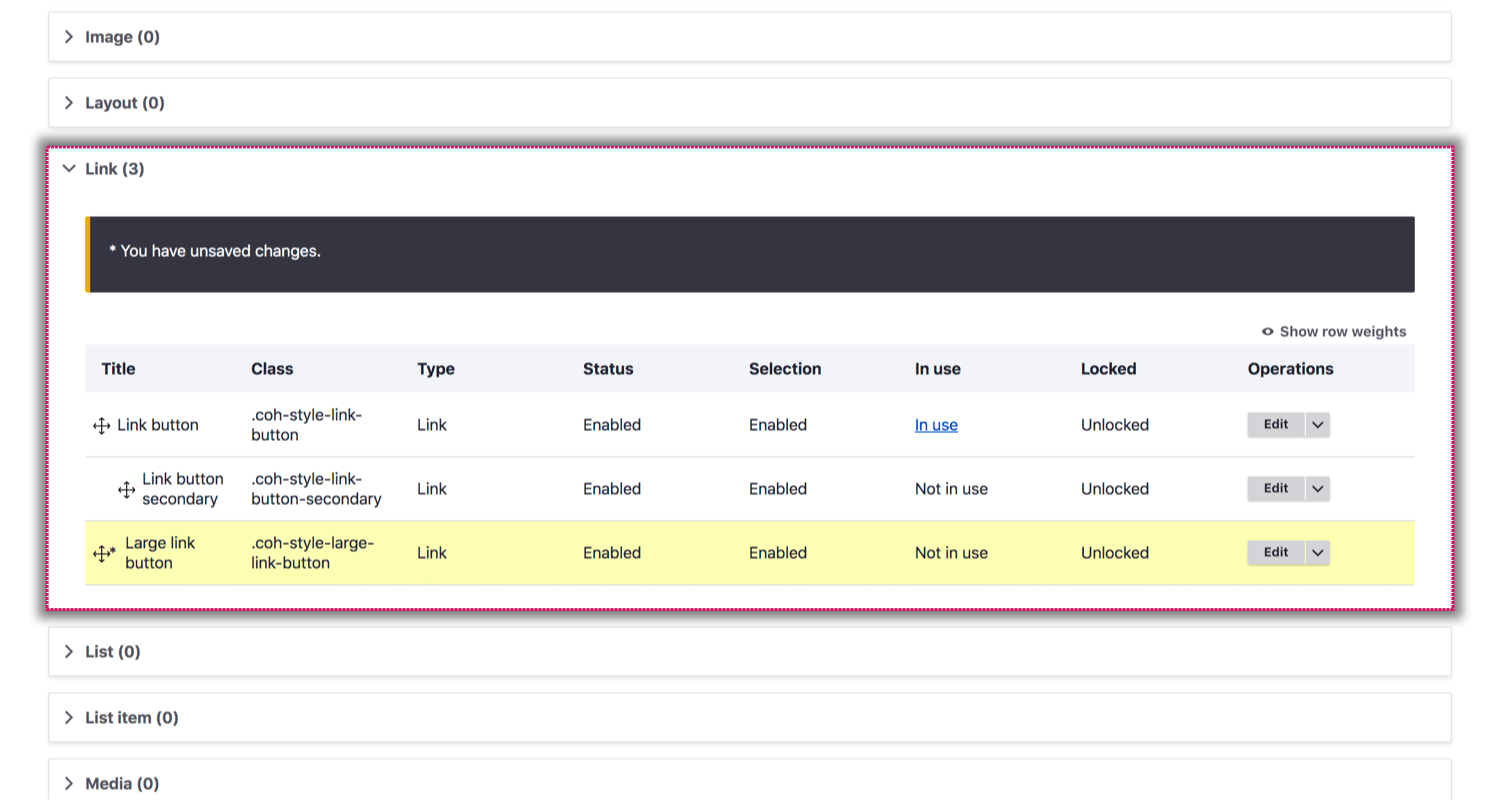
Reordering your custom styles
The order that the Custom styles are shown in the list is the actual order they are written in the style sheet. Most of the time this will not have any impact but there are some instances where it will. For example, if you apply two styles to the same element and they both include the same CSS property, the CSS property in the style that comes last will be applied. This is due to CSS specificity.
For this reason, you can reorder the styles in your Custom style list to change their specificity. To reorder your styles:
- Navigate to Site Studio > Styles > Custom styles
- Open the section with the Custom styles you want to reorder
- Drag your Custom styles up or down to reorder them
- Click Save at the bottom of the screen to save your changes.
