
Adding drop zones to a component
You can add Drop zones to your Components to allow other Components or Elements to be nested within them. Drop zones allow your Components to become containers.
For example:
- Create a Component from an Accordion tabs container and add a Drop zone to place your Accordion tabs items in
- Create a Component from a Slider container and add a Drop zone to place Slide items in
- Create a Component with multiple columns and add a Drop zone to each column to make a layout Component
Creating a component with drop zones
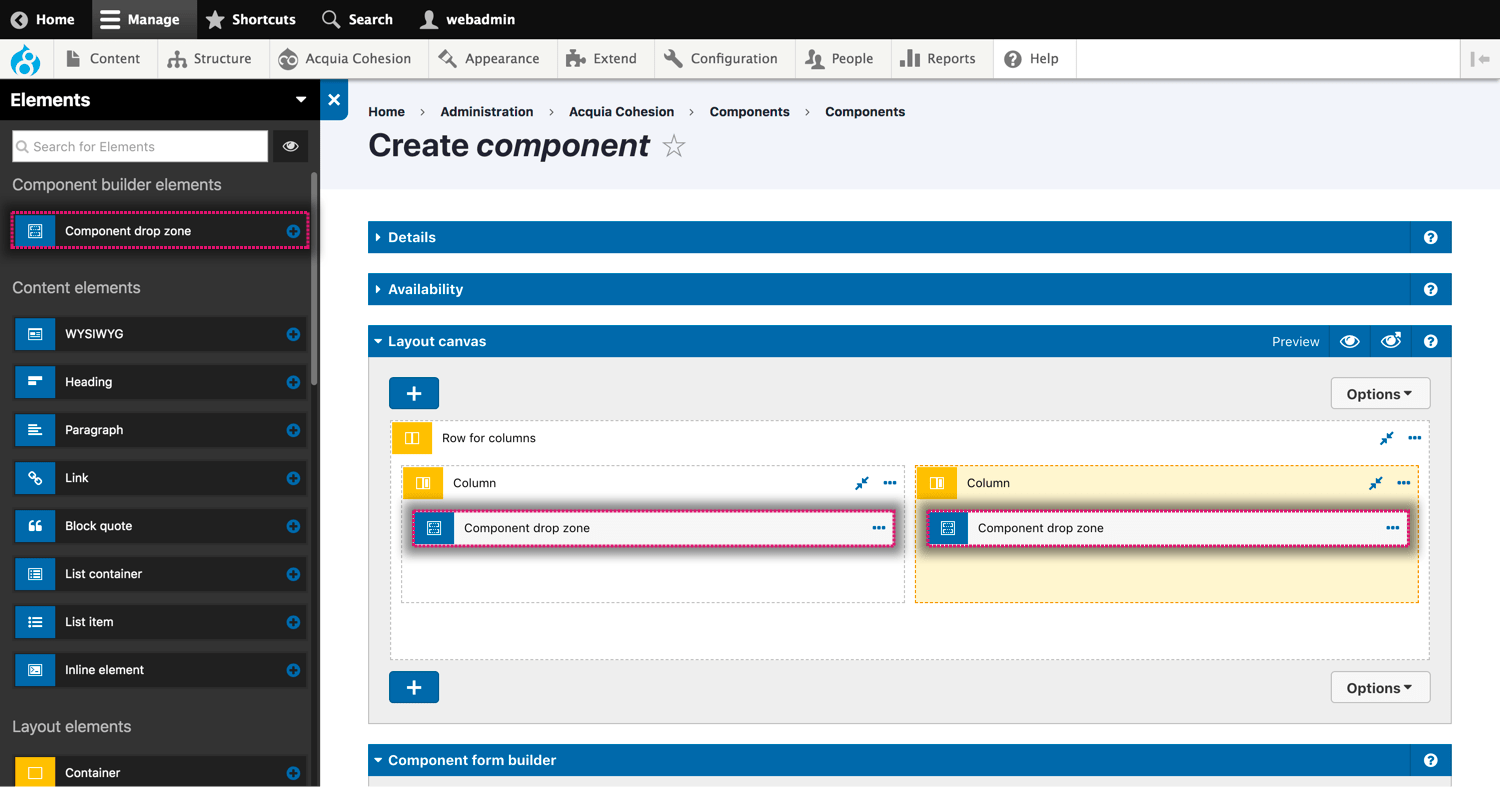
To create a component with drop zones:
- Navigate to Site Studio > Components > Components
- Click on Edit to edit a Component
- Click on the +plus button to open the Sidebar browser
- Click the drop-down arrow and select Elements
- Within the Elements list, drag the Component drop zone onto your Component layout where you want the editor to be able to drop (nest) other Elements or Components
- Double click on the Drop zone element to edit its name. This is the label the editor will see in the Drop zone.
Drop zones allow you to specify where nested Elements will be rendered within your Components layout. It's important that you place your Drop zones in the correct place.
Using a component with drop zones
When Drop zones are added to a Component they display within the Component when it's added to a page. Editors can drop (nest) other Components or Elements within the Drop zones. The screenshot below shows what a Component with two Drop zones looks like when added to the Layout canvas.
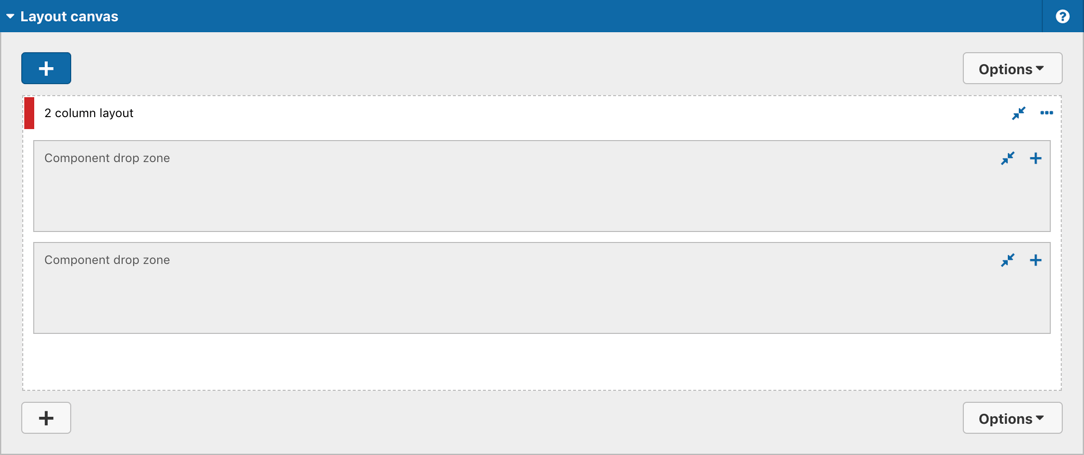
The screenshot above shows that the Drop zones are always stacked on top of one another, unless a width is set.
Set the drop zone width
To set the drop zone width:
- Navigate to Site Studio > Components > Components
- Click on Edit to edit a Component
- Add a drop zone to your Component
- Double click to edit the drop zone
- Click Properties > Settings > Drop zone width
- Select the column width from the select list.
Drop zone widths do not show on the Component Layout canvas when building your Component.
Set the drop zone visibility
When the drop zone is empty, you can hide a specific css selector.
- Navigate to Site Studio > Components > Components
- Click on Edit to edit a Component
- Add a drop zone to your Component
- Double click to edit the drop zone
- Type a CSS selector into the visibility input.