Step 1a. Installing the Site Studio modules on your website with composer
Using composer is the preferred way of managing your modules and themes as composer handles dependencies automatically and there is less margin for error. You can find out more about composer and how to install it here: https://getcomposer.org/.
The Site Studio module and theme does not currently exist on drupal.org, so you will need to tell composer where to find the repositories and also add the dependencies.
1. Open your terminal
Open up your terminal and navigate to your project root directory.
2. Require the module in your composer.json
Now run the following commands to require the Site Studio module:
composer require acquia/cohesion:^6.9
You'll need to change the version number above to correspond to the latest release of Site Studio which you can find on the packagist page: https://packagist.org/packages/acquia/cohesion.
Site Studio will install along with several module dependencies from drupal.org.
3. Enable Site Studio
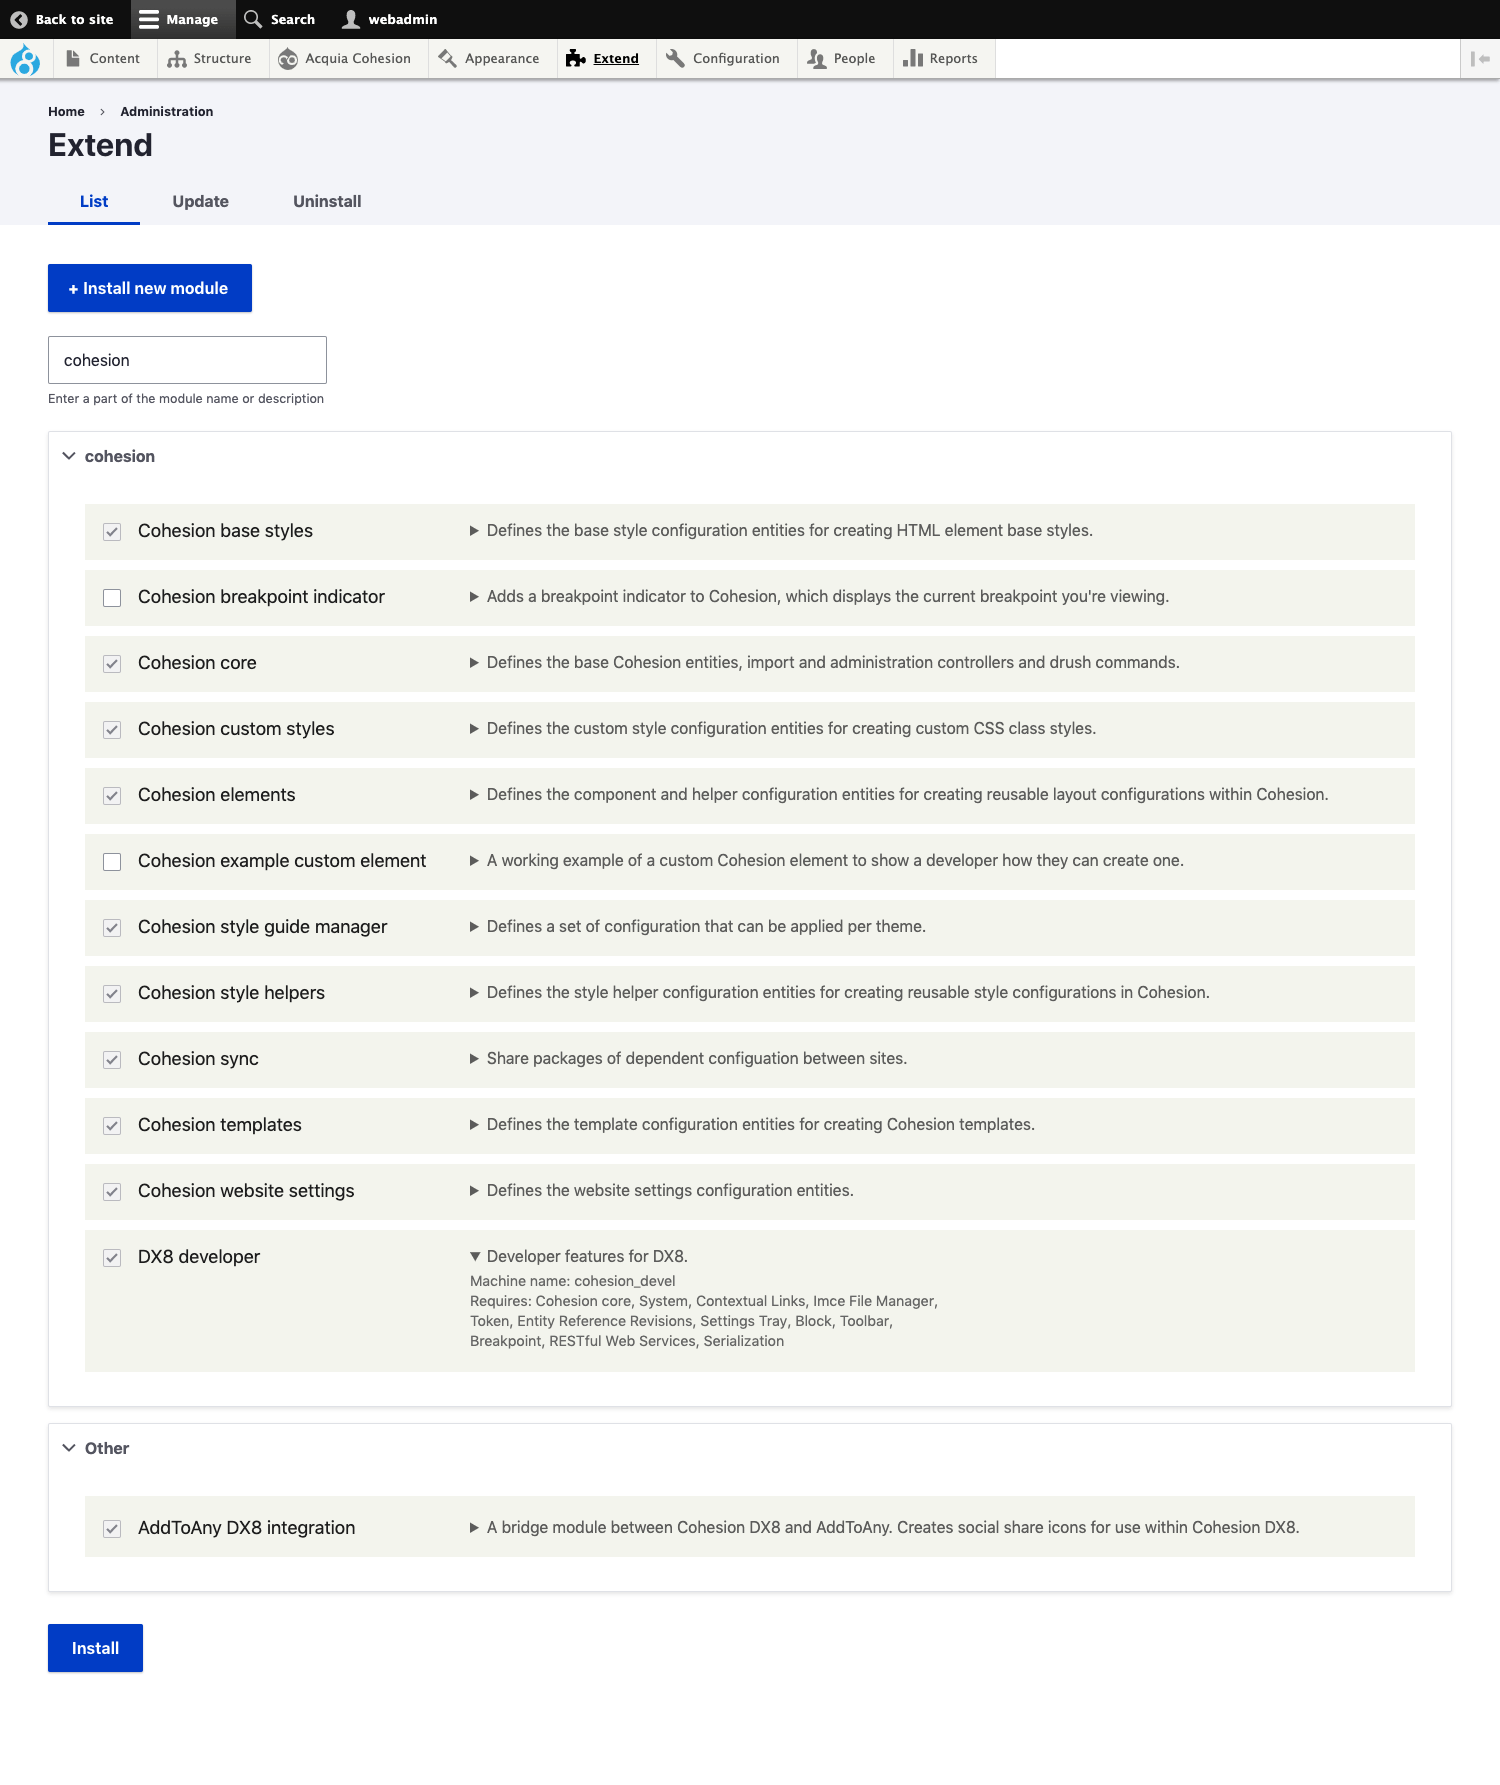
You can now enable Site Studio through the UI once logged in as the admin user and navigate to: /admin/modules
Enable Site Studio core and all dependent modules together except for the "Site Studio example custom element" module as shown below:

Click the form submit button and agree to install the dependencies. You will now see a new "Site Studio" menu item in the administration toolbar.
Alternatively you can also enable the modules via drush by running the following command:
drush pm-enable cohesion cohesion_base_styles cohesion_custom_styles cohesion_elements cohesion_style_helpers cohesion_sync cohesion_templates cohesion_website_settings -y

